How to use WebSockets • React Native
It can be very simple to do GET, POST, PUT and DELETE requests with React Native (see the official Expo documentation https://docs.expo.io/versions/latest/react-native/network/), therefore, those requests are not interesting when we want to do a chat for example (we can talk about “real time events”).
To do it, you need first to create a WebSocket server. It won’t be on the phone, because usually the phone is only the client.
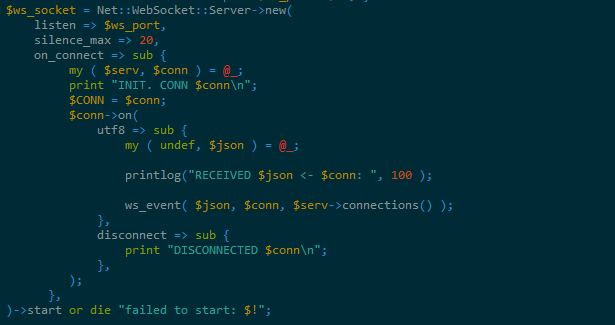
You can create a simple WebSocket server with this Perl library : https://metacpan.org/pod/Net::WebSocket::Server
Only few lines are necessary to make your WebSocket server running.
In your App.js, you can add the IP of your server in a global variable at the top of your file :

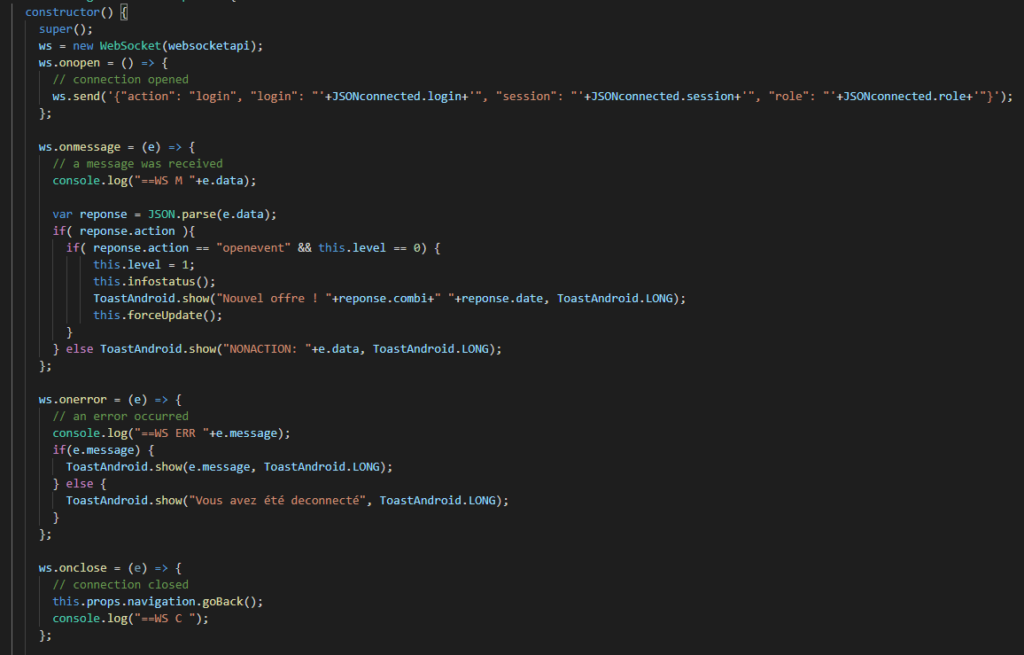
Then in your constructor you can add the WebSocket( WS_ADRESS_SERVER_STRING ) Javascript object, so the websockets will be listen when the application is starting.
You can add the 4 events onopen, onmessage, onerror, onclose :
Now you should add ws.send() to send data inside your code or inside your UI with onPress.