Month: July 2021

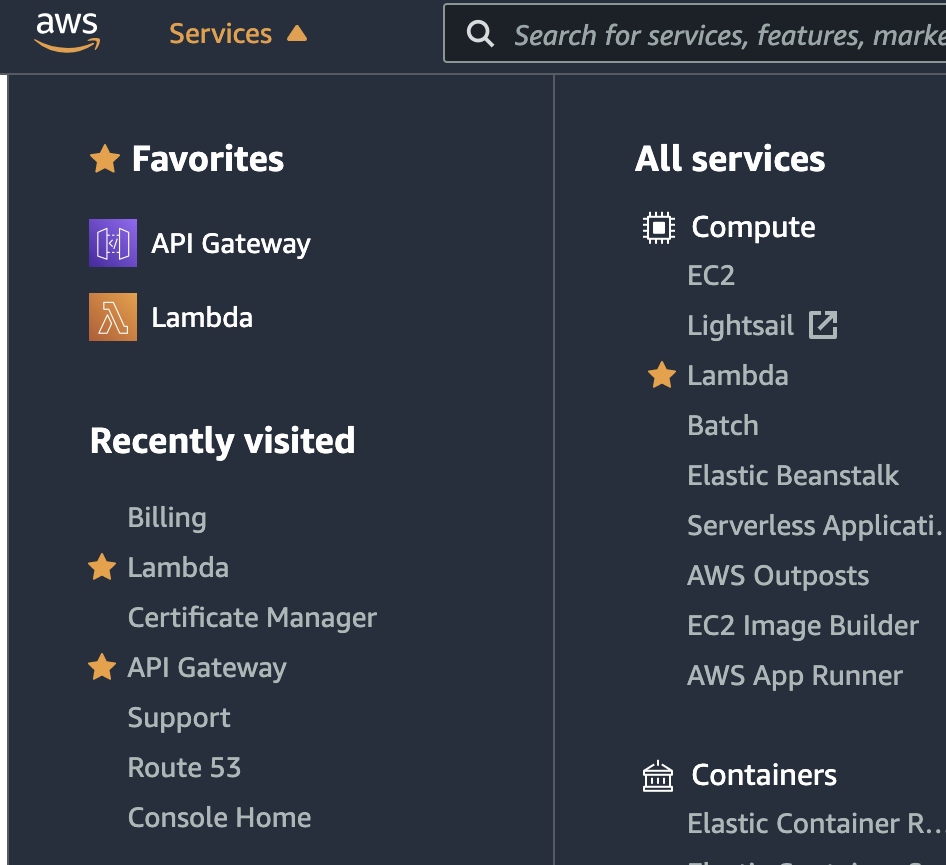
Google Cloud Function VS AWS Lamdba (how to import)

There are some differences between Google Cloud and AWS when you want to deploy your function for your API.

My point of view is that Google Cloud function may be a bit more simple to deploy but AWS is in a way the most reliable and complete cloud environnement nowadays.

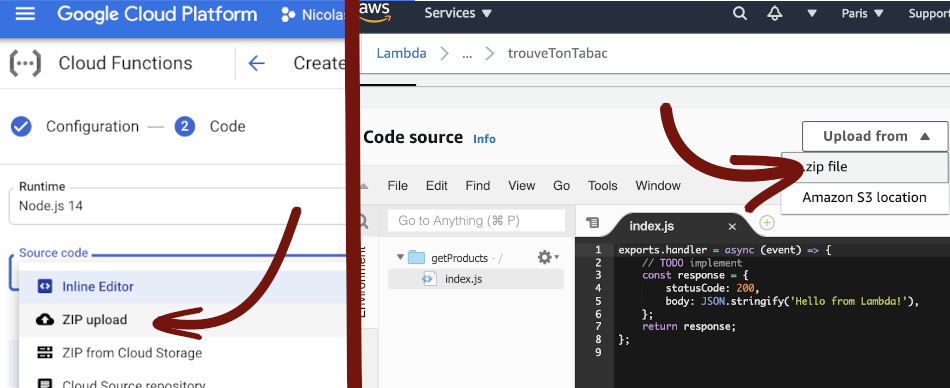
On both cloud environnement you can upload the code with a ZIP, you can so use the same way to adjust your code for AWS:

We will upgrade the code with a repository that will be in a ZIP

Differences between Google Cloud functions and AWS Lambda (Node.JS)

THE DEPENDENCIES
– In Google Cloud, the dependencies are automatically installed from the package.json file
– In AWS, you need to install the dependencies with npm or yarn, that will build the node_modules folder
If you don’t have the node_modules folder, your Lamdba function will not work with the following error:

{
  "errorType": "Runtime.ImportModuleError",
  "errorMessage": "Error: Cannot find module 'MODULE'\nRequire stack:\n- /var/task/index.js\n- /var/runtime/UserFunction.js\n- /var/runtime/index.js",
  "trace": [
    "Runtime.ImportModuleError: Error: Cannot find module 'MODULE'",
...

THE MAIN FUNCTION

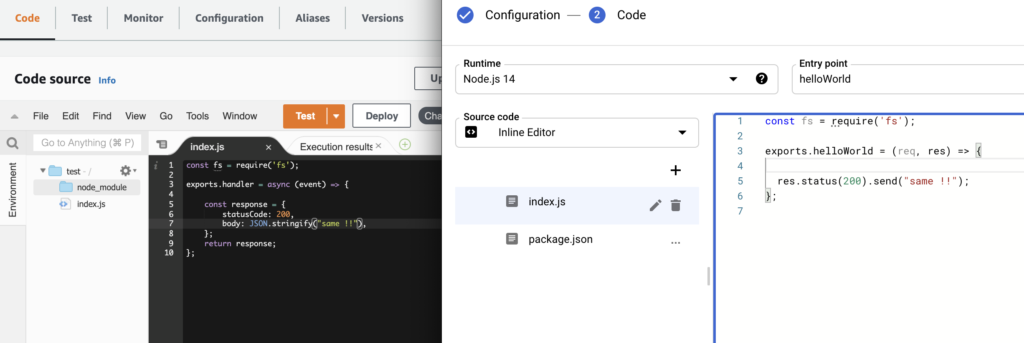
With Google Cloud, the example function looks like this:

exports.helloWorld = (req, res) => {

  res.status(200).send(message);
};
  • You use the res object with the send() method to send the response

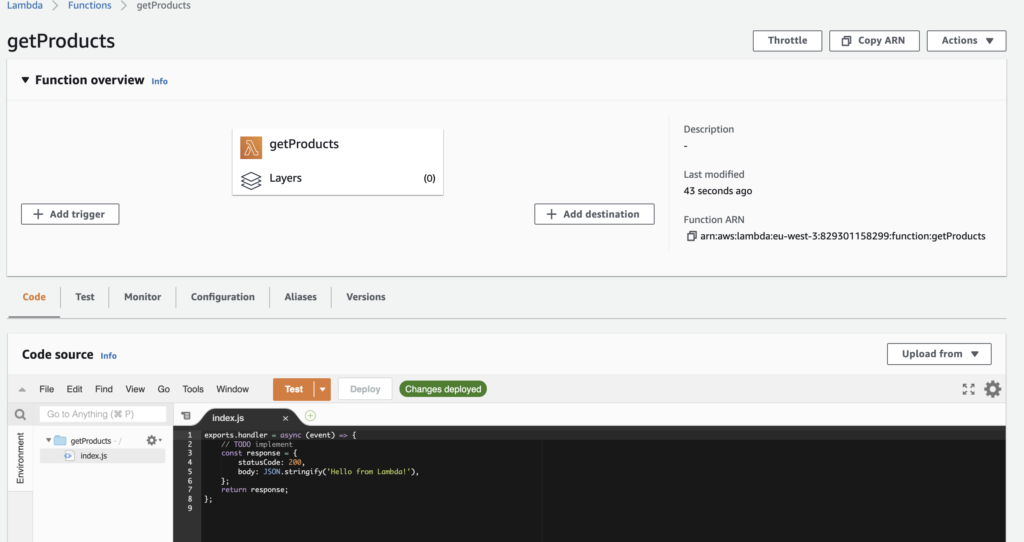
With AWS, the example function looks like this:

exports.handler = async (event) => {

    const response = {
        statusCode: 200,
        body: JSON.stringify(jsonObj),
    };
    return response;
};
  • You return a JSON object response that should contains the body and the statusCode

So the same code will looks like this:

Using parameters

Let’s say now we want to use a parameter for our route, that will be number and the value will be 10, so we will call the route helloWorld?number=10

On GOOGLE CLOUD, to get the “number” parameter, we will use the req object :

exports.helloWorld = (req, res) => {
    let number = req.query.number;

On AWS, to get the “number” parameter, we will use the event object :

exports.handler = async (event) => {
    let number = event["params"]["number"];

Create quickly API with AWS – Lambda/API Gateway

Amazon Web Services — Wikipédia

This article is dedicated to new users to AWS – Amazon Web Services – that wants to use this cloud instead for others (Azure, Google Cloud) which seems to be the best choice at the moment. Indeed, AWS is the most complete scalable and dynamic cloud solution.

However, this is not so simple to understand all the concepts, if you look for simplicity you may be interested by Google Cloud that I used before.

In order to use API Gateway and Lamdba, you should add them in favorite in the Services:

Create your API functions in AWS Lambda

We can use AWS Lamdba to create routes that can be used for our applications.

So, you can click Create function, in order to see the form bellow.
Let’s say we want to create a route to list the products of our app, it will be a GET method and we will call it getProducts.
We will use Node.JS because I have to habit to use Javascript and Typescript but you can choose the runtime you are in ease.

Then you can click Create function, we don’t need the others settings.

You should be now able to see the function overview with the default example in the code editor:

You can try the example it will show the string “Hello from Lambda”, the response that is returned in the example.
We can now write our own function from scratch here or alternatively we can upload our code from a ZIP file.

Create our API Gateway route (HTTP)

In the overview of the Lambda function you can see the button Add trigger, you can use it to add the API event that will call our function.

Click “Add trigger”
Select “Create API”, then “HTTP API” (best for cost) and “Open” the endpoint so your app can use it

You can then click Save and so you should see your new trigger, the API Gateway trigger:

Now you can try it by going on the API endpoint link in the details.
You can use it like it in your application or you can change it by adding your own domain, for exemple api.myapp.com/getProducts
You can do that in Custom Domain Names or directly in your domain provider, in the DNS configuration, making a redirection.

Creating an API Gateway (REST API)

You could also, if you need it, use multiple methods such GET, POST, UPDATE, DELETE, … if you created a REST API Gateway :

You can then use your Lambda function for each methods you want to use.

Color picker with React.JS

Example of a color picker made with React.JS

In order to have a color picker on our React.JS application, we can use the SketchPicker library

Full example

Color: <TextField variant="outlined" id="standard-basic" style={{padding: 5, width: '90%', background: color}} value={color?color:''} onChange={(e) => { setColor(e.target.value); }} />
<SketchPicker 
   color={ color?color:'#fff' }
   onChangeComplete={ (colorSelected) => {
         setColor(`${colorSelected.hex}${decimalToHex(colorSelected.rgb.a)}`);
      } 
   }
   presetColors={['#D0021B', '#F5A623', '#F8E71C', '#8B572A', '#7ED321', '#417505', '#BD10E0', '#9013FE', '#4A90E2', '#50E3C2', '#B8E986', '#000000', '#4A4A4A', '#9B9B9B', '#FFFFFF']}
/>

Alerting user with a small messaga bubble – Snackbar – React.JS

In your web app, you will have to notice the user when he is doing some actions in your user interface. We can do it with a small message bubble called Snackbar, here is what it looks like:

How we will do it

setSnackSeverity("error");
setSnackMessage("The last cell cannot be deleted.");
setOpenError(true);

In your code, we will use these 3 lines to:
– Set the severity “error”, there are 4 types of severity

– Set the error message that will be displayed “The last cell cannot be deleted.”
– Show the error message (during few seconds)

Full example

import Snackbar from '@material-ui/core/Snackbar';
import MuiAlert, { AlertProps } from '@material-ui/lab/Alert';
function Alert(props) {
  return <MuiAlert elevation={6} variant="filled" {...props} />;
}
...
const [snackSeverity, setSnackSeverity] = useState('error');
const [openError, setOpenError] = useState(false);
const [snackMessage,setSnackMessage] = useState('Error');
...
setSnackSeverity("error");
setSnackMessage("The last cell cannot be deleted.");
setOpenError(true);
...
<Snackbar
   anchorOrigin={{ vertical: 'bottom', horizontal: 'right' }}
   open={openError}
   onClose={(e)=>setOpenError(false)}
   autoHideDuration={3000} 
   >
     <Alert onClose={(e)=>setOpenError(false)} severity={snackSeverity}>
       {snackMessage}
     </Alert>
</Snackbar>