Category: iOS

Generate IPA file from XCode

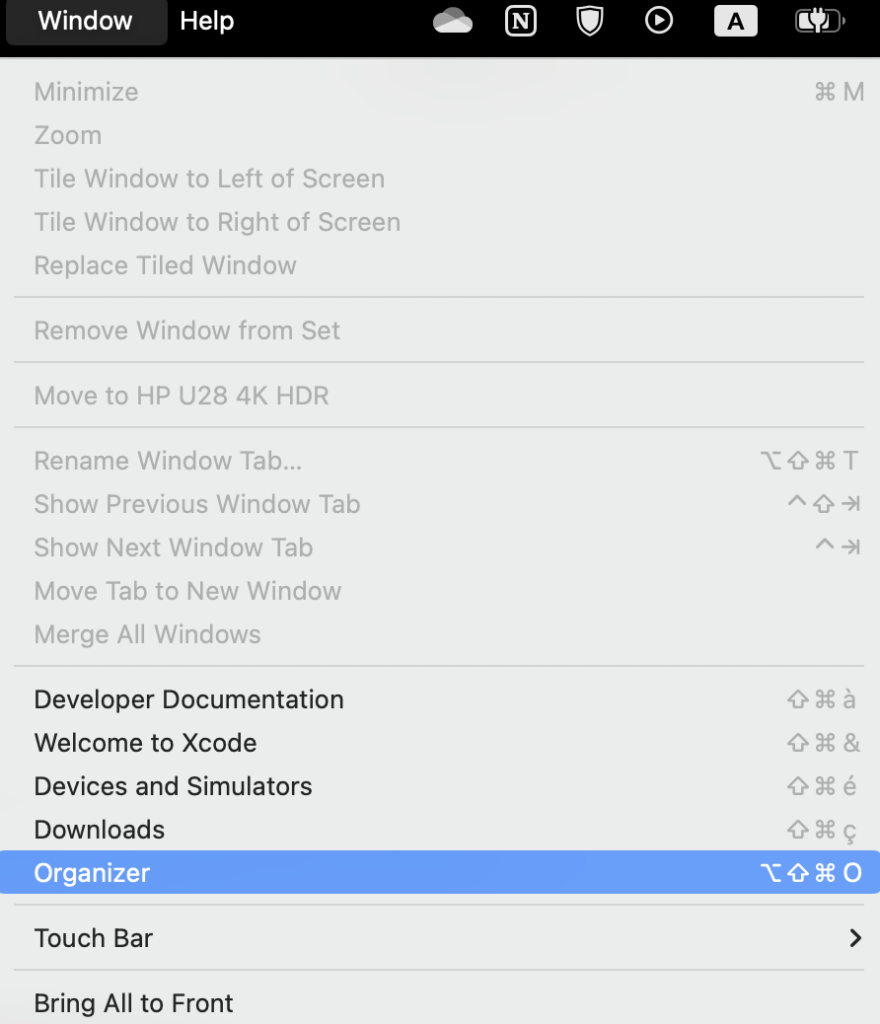
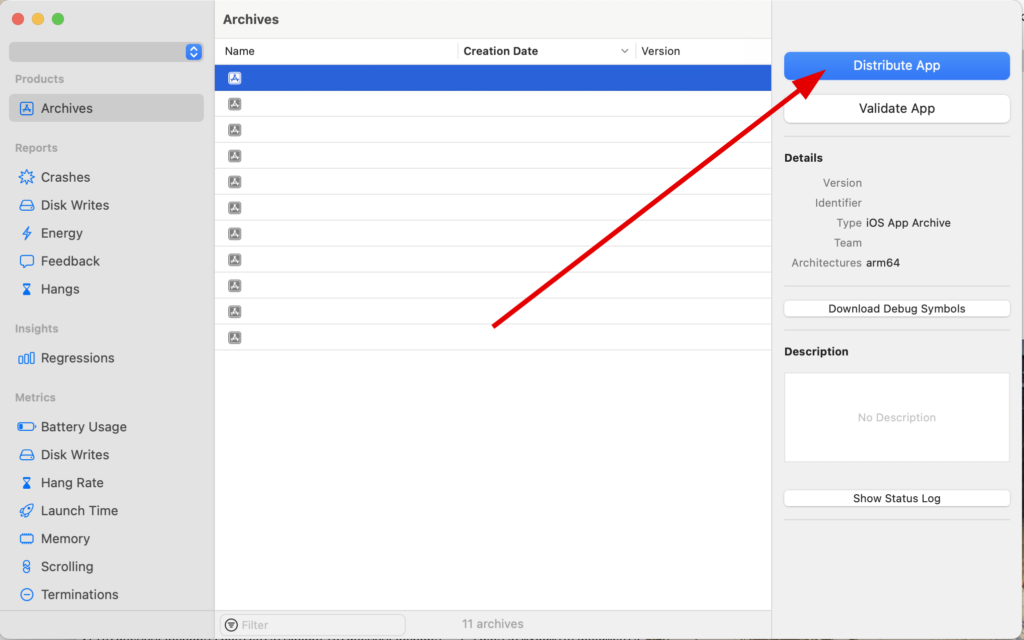
To generate a IPA file from XCode you need to archive your project, if you already did it before, you can open the organizer. If you never archived your project, you can go to Product > Archive and then it will open the Organizer when the compilation is complete.

Archive the project if you didn’t before
OR open the organizer if you already archived your project
Click on Distribute App
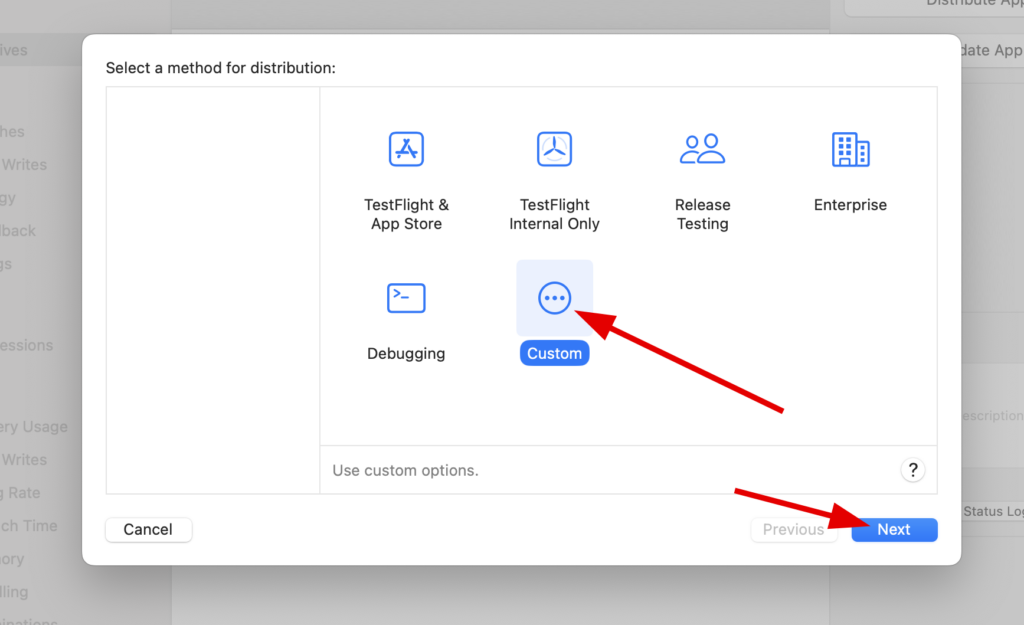
You can click on “Custom” and then “Next”
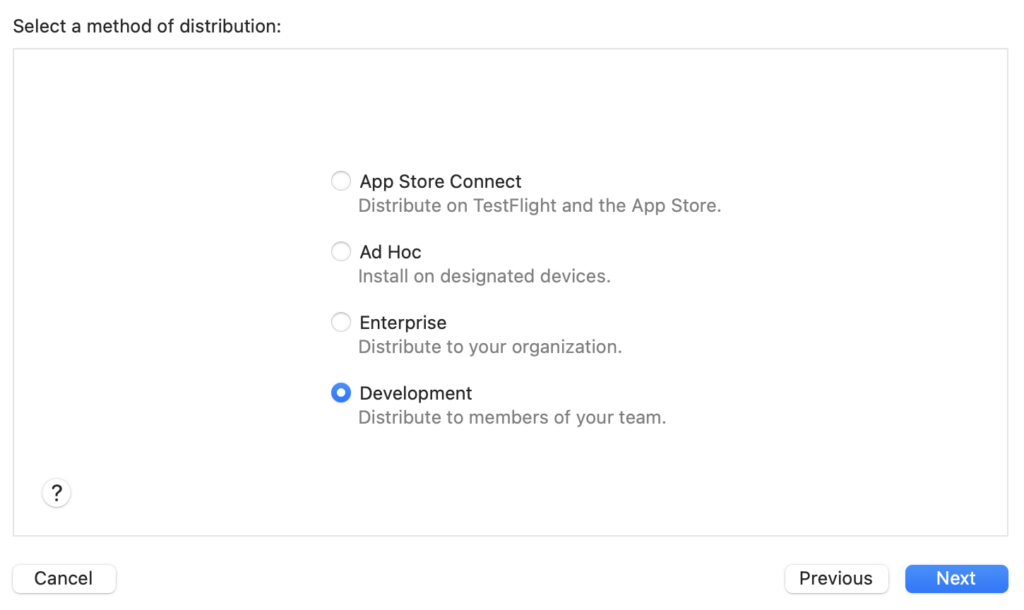
You should select “Development”
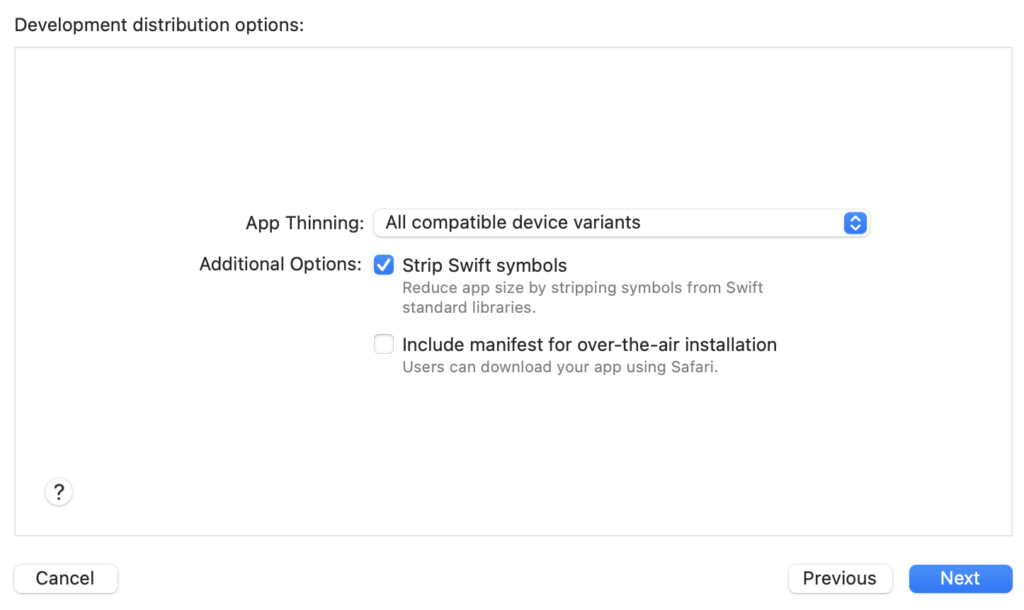
You can then select “All compatible device variants” in App Thinning
You can then select “Automatically manage signing”

Then you should be able to go to the final step

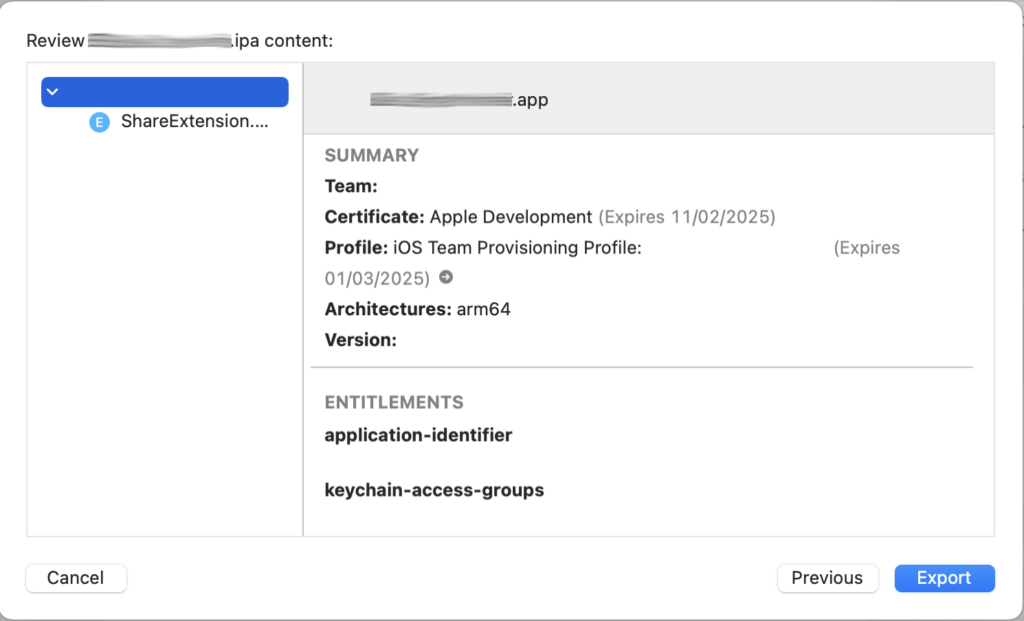
Export the project to IPA file with Export (select the right folder)

Integrate Intune SDK to React Native project

This article is about my experience with integration of Intune SDK to a react native project as there is no official SDK provided by Microsoft for React Native.

Copy the SDK content in the /ios folder

Go to https://github.com/msintuneappsdk/ms-intune-app-sdk-ios and download all the repository. Extract the content in a folder named “IntuneMAM” and put it in the /ios folder, same level as your *.xcodeproj file.

Run the configurator

In the root of the Intune SDK file, you should have the IntuneMAMConfigurator file that will be configuring the plist and entitlements automatically :

% ./IntuneMAMConfigurator -i ../PROJECTNAME/Info.plist -e ../PROJECTNAME/PROJECTNAME.entitlements 
2024-02-29 13:16:45.787 IntuneMAMConfigurator[36231:7276997] Success!!!

This is possible that you have rights issues (permission denied), to solve it you can do the usual chmod :

chmod 777 IntuneMAMConfigurator

Then, based on your needed, read this documentation: https://learn.microsoft.com/en-us/mem/intune/developer/app-sdk-ios-phase3

Adding extra dependencies

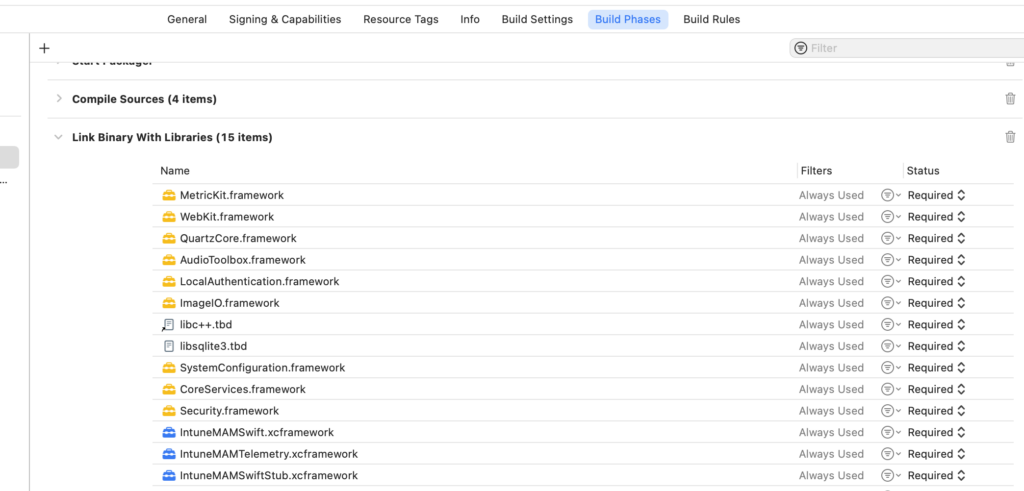
Add the following dependencies to be sure the SDK will work:

  • MessageUI.framework
  • Security.framework
  • CoreServices.framework
  • SystemConfiguration.framework
  • libsqlite3.tbd
  • libc++.tbd
  • ImageIO.framework
  • LocalAuthentication.framework
  • AudioToolbox.framework
  • QuartzCore.framework
  • WebKit.framework
  • MetricKit.framework
These libs should be added

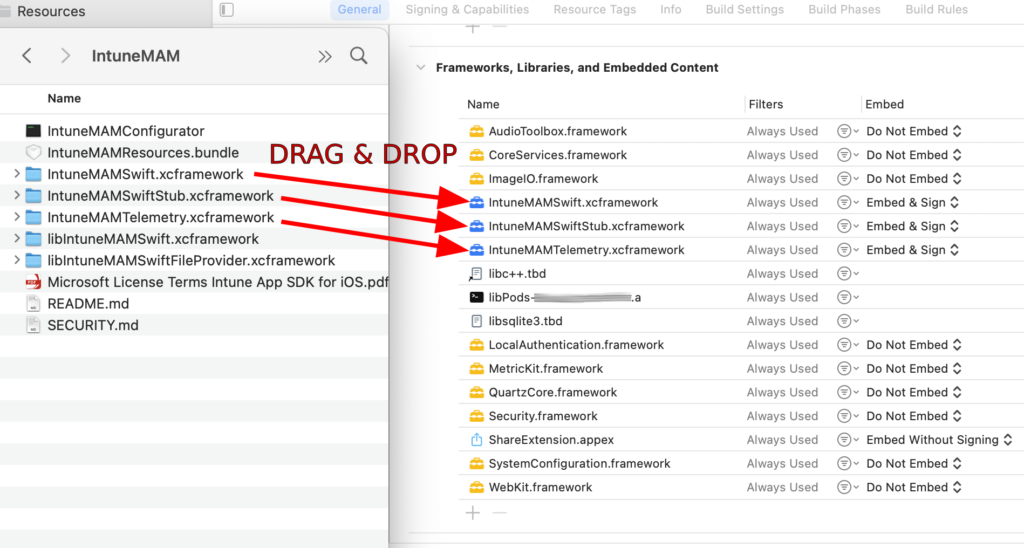
Drag & drop the .xcframework folders

Open XCode and drag & drop the xcframework folders to “Frameworks, Libraries and Embedded Content”

Drag & Drop these 3 xcframework folders that don’t start with “lib” (they are static frameworks)

Add the Keychain Group Intune MAM

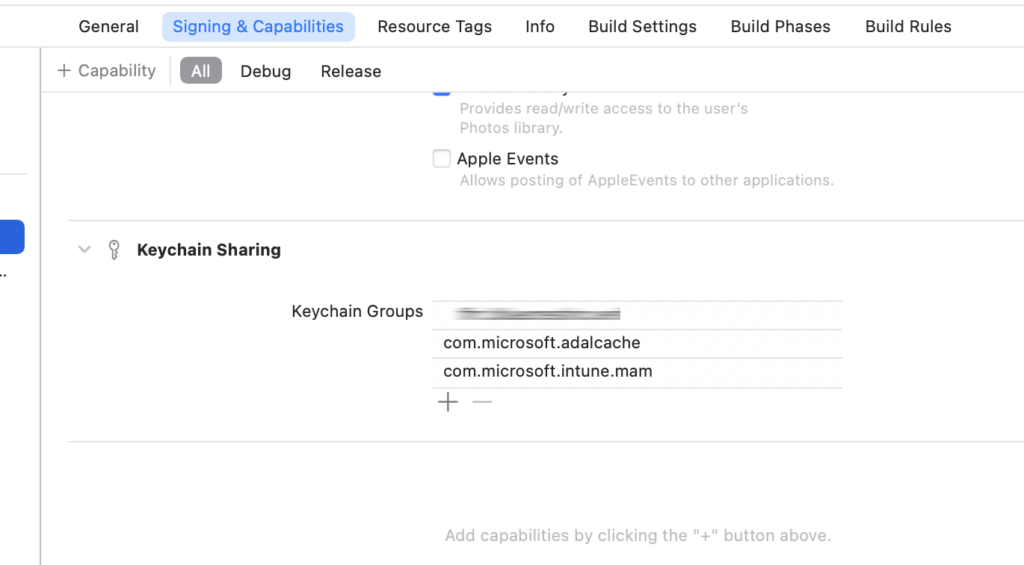
Then In Signing & Capabilities tab, go in Keychain Sharing section and add:

com.microsoft.intune.mam
Add the keychain group “com.microsoft.intune.mam”

You can notice that I also have added com.microsoft.adalcache that is related to MSAL (Microsoft Authentication Library).

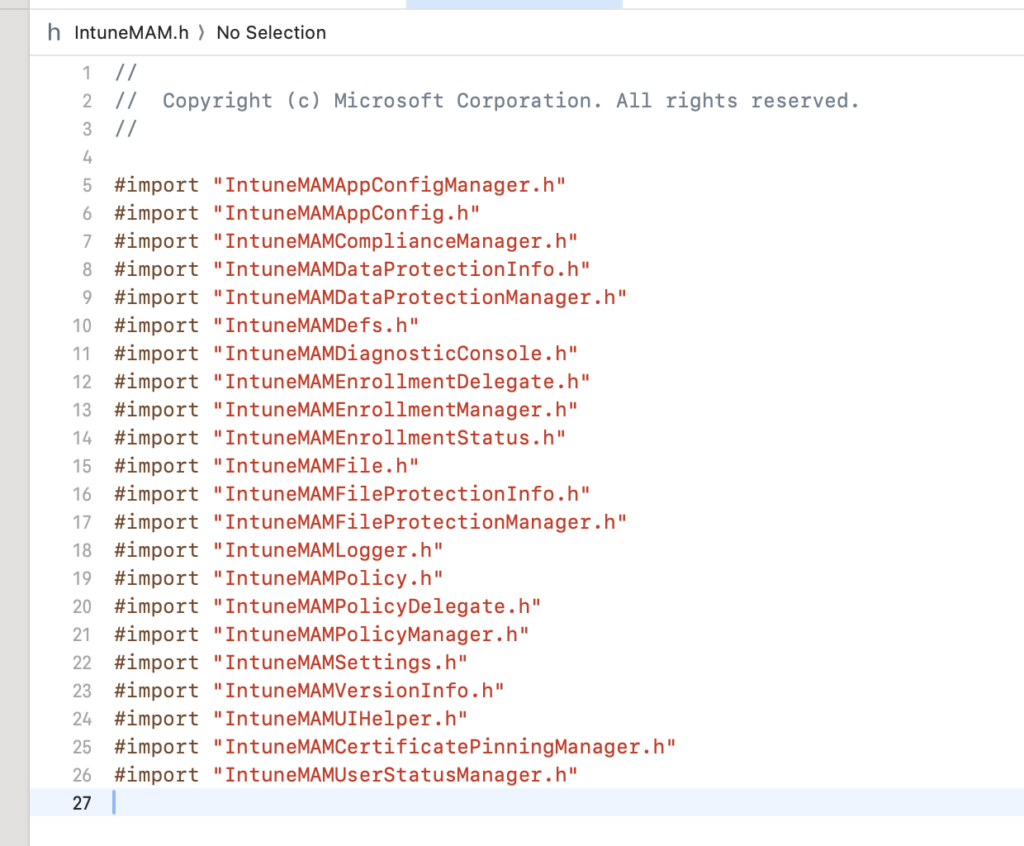
Add headers to your AppDelegate.mm and AppDelegate.h

AppDelegate.h

#import <React/RCTBridgeDelegate.h>
#import <UIKit/UIKit.h>
#import <IntuneMAMSwift/IntuneMAM.h> // <--- Add it

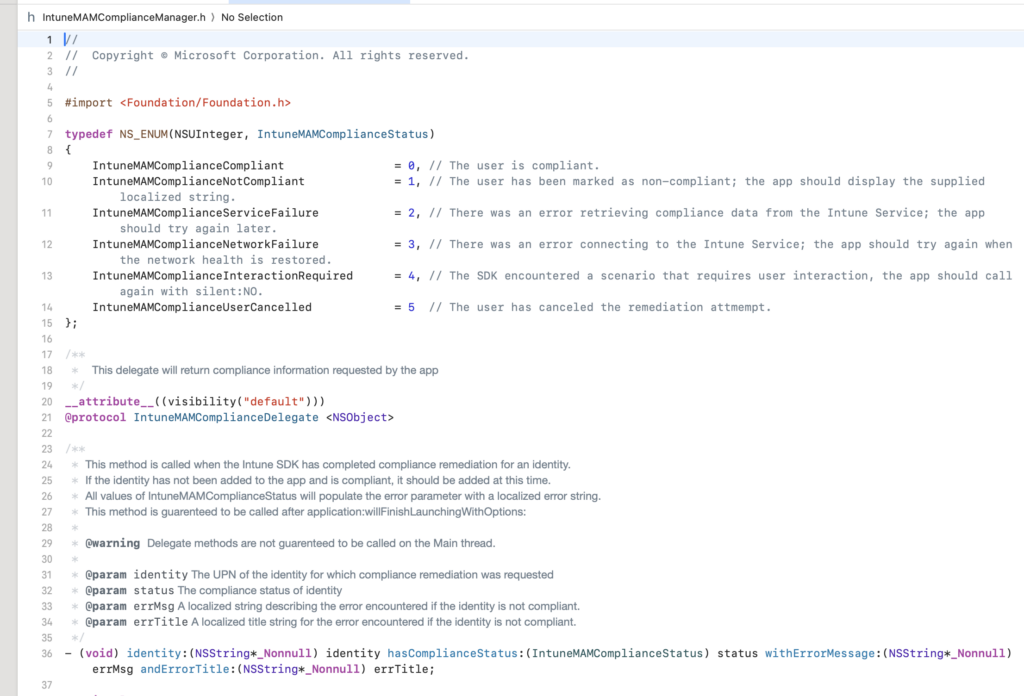
@interface AppDelegate : UIResponder <UIApplicationDelegate, RCTBridgeDelegate, IntuneMAMComplianceDelegate> // <--- Add IntuneMAMComplianceDelegate

@property (nonatomic, strong) UIWindow *window;

@end

AppDelegate.mm

React Native : fix ‘React/RCTDefines.h’ file not found

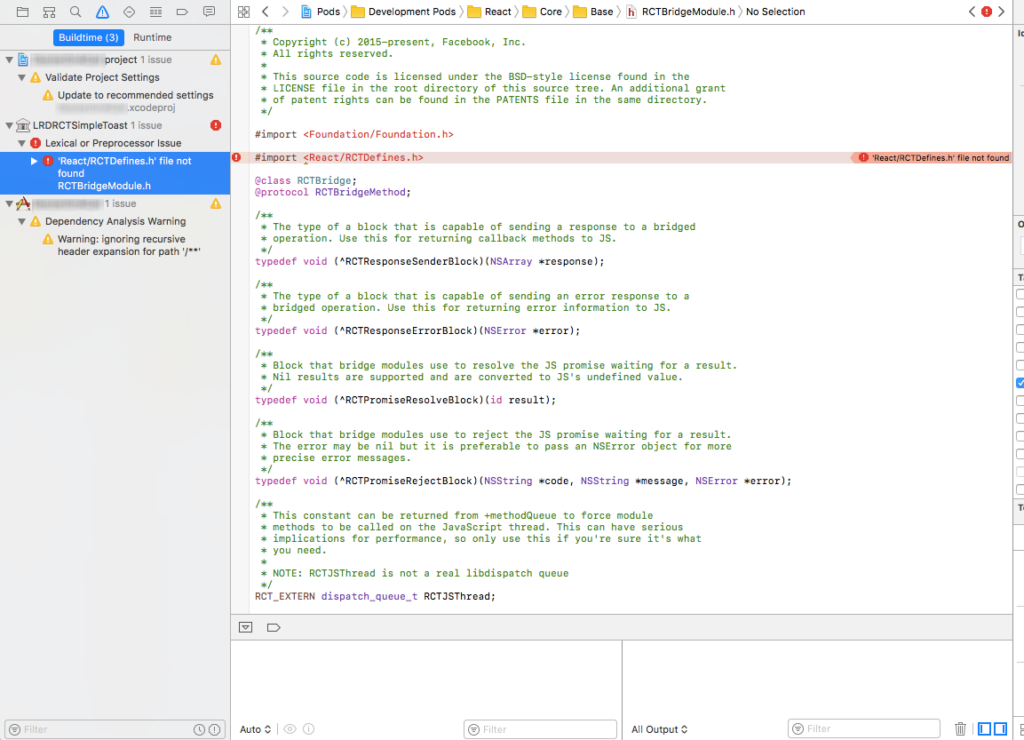
It is possible that after adding a new library in your React Native project (or after upgrading or adding some packages) you have the following error in XCode when you try to build:

<React/RCTDefines.h> file not found

or

'React/RCTDefines.h' file not found

This error means that the library is not correctly set up with your React Native project.
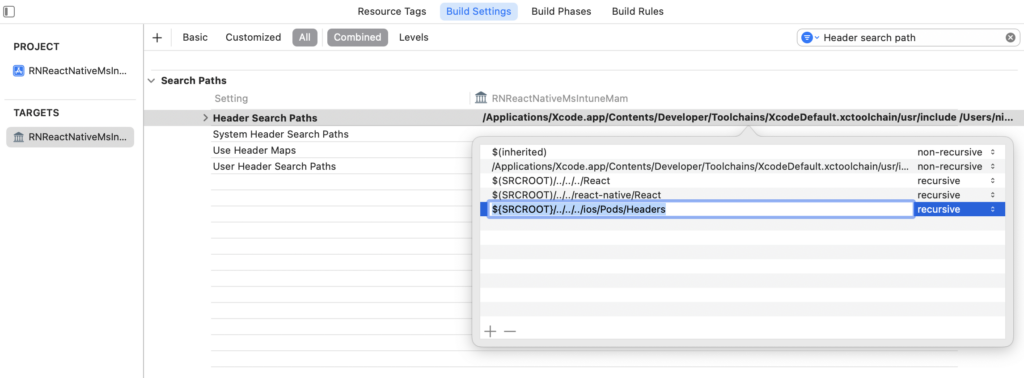
To fix this error, go to your library settings. You will have to modify the Header Search Path input in Build Settings :

Go to Libraries > YourLib.xcodeproj > Targets > Build Settings > Search “Header Search Path”

“Header Search Path” should be in the section “Search Paths”. I recommend to use the search input because there are a lot of fields.

In my case, the external library named “RNReactNativeMstuneMam.xcodeproj” was doing the problem, so I am opening the settings of the xcodeproj file of this project. It can be any other library with another name, but you will have to fix the xcodeproj file, following to the error path that you have.

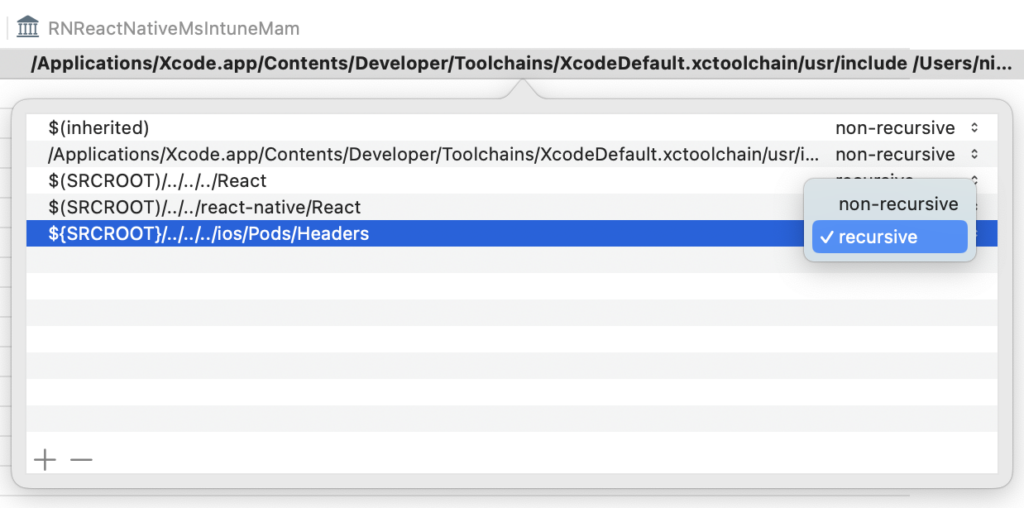
Now, double click to Header Search Paths and add:

${SRCROOT}/../../../ios/Pods/Headers
Add the entry ${SRCROOT}/../../../ios/Pods/Headers by double clicking

Set it to recursive:

set it to recursive

Now, you can clean and build again:

Clean project and build again

The error should not appear anymore as your library will find the Pods headers.

Mac M1 : react native iOS mobile app on Simulator

I decided to make an article because I spent almost 5 days on this problem, and I don’t want it never happen. So let me help all the people that can be in the same case of me.

– You have a Mac M1 running on ARM 64 architecture
– You are working on a React Native or Swift project with Xcode

Exclude the ARM architecture in the Podfile

Add the following lines in the Podfile (/ios/Podfile) :

    post_install do |installer|
      ## FIX MAC M1 ARM
      react_native_post_install(installer)
      installer.pods_project.build_configurations.each do |config|
        config.build_settings["EXCLUDED_ARCHS[sdk=iphonesimulator*]"] = "arm64"
      end
    end

You should check that there is only one “post_install” in the file, if there is not you can add it at the end of the file, if there is already “post_install” somewhere, just put the instructions to exclude the architecture ARM 64 at the end of the “post_install” section.

Dependencies with CocoaPods

In the /ios folder of your React Native project, you should run the following command to build all the dependancy in the /Pods folder :

sudo arch -x86_64 pod install --allow-root

or, you can also use pod-install to be sure all is installed:

npx pod-install

In case of error: Delete /Pods folder, delete Podfile.lock and start again. In case of error of dependancies in node_modules, delete node_modules and run yarn.

Exclude the ARM architecture in Xcode

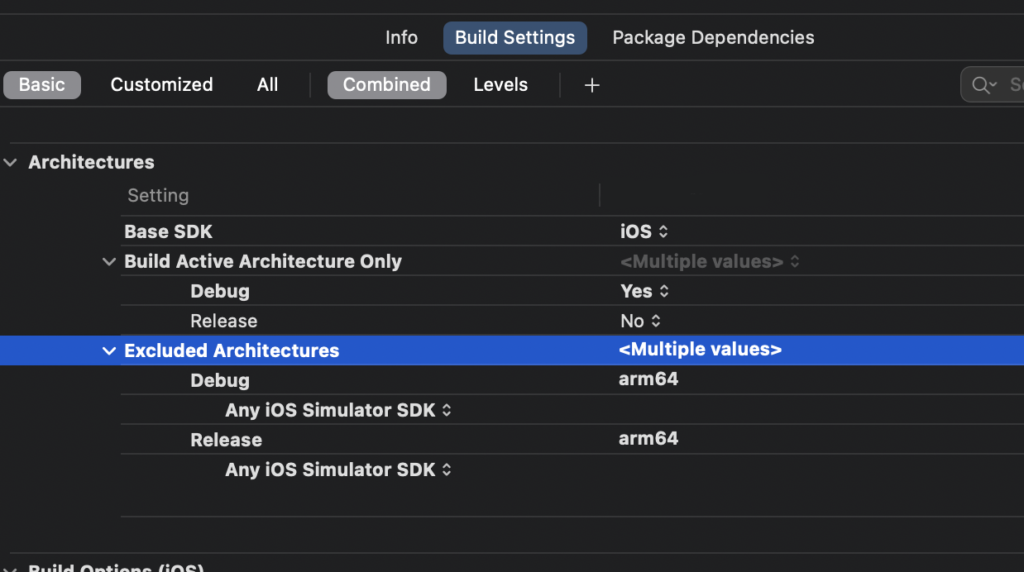
Now, you should also exclude the architecture in the project settings in Xcode :

Exclude the architecture “arm64” in Project > Build Settings > Architectures

Then if you start the react native project on Simulator it should works !