Nicolas BAPTISTA - Page 6 of 6 - Blog of a Parisian software architect

This blog contains 60 articles

N I C O L A S    B A P T I S T A

PERSONNAL BLOG

SOFTWARE ARCHITECT • JAVASCRIPT DEVELOPER • DESIGNER


LinkedIn Contact Github Remote OK Resume My Projects

Google Cloud SQL : SUPER privilege error while importing

When importing SQL file on Google Cloud (MySQL 5.7), I faced the following error:

exit status 1 ERROR 1227 (42000) at line 18: Access denied; you need (at least one of) the SUPER privilege(s) for this operation  

You can see the error when go in “Operation”, you can see the logs of the MySQL instance

In order to solve this problem, you should understand that we do not have SUPER privileges on the Google Cloud SQL instance, it means if you do “SHOW GRANTS” on your MySQL, it will tell you that you have almost all the rights but not all.

This problem happen when you try to import some specific things such triggers, views, … so you should be careful on the SQL export when you do it.
As for me, I’m using MySQL Workbench 8.0, it seems that by default I have this error when I try to import the SQL file generated on Google Cloud.
I tried to import an export from Google Cloud to another instance and seems to work, so the problem is when you export the SQL file it should not contains things that needs specific privileges.
I found a configuration that worked for me and now I don’t have this annoying error anymore. Great !
Here is the options I have used. First, when you export, go to Advanced Options…


Then you should check the following options:

Now you can try to import the SQL file on Google Cloud, it should works ! F*ck yeah!

Compare different branches with GitLens

Is it possible that in your working project, you are using different branch that you need to update and you cannot merge in master because of some obligations (working with different clients, different teams, …). So what we want is only to update few files when we modify it on another branch.

I find out an amazing tool GitLens to compare different branches from your git project directly from the IDE (using Visual Studio Code).

You can find it in the Marketplace here is what it looks like:

After you have installed it, you will have a new tab on Visual Studio Code, in this tab you will be able to see 5 tools:

  • Repositories : See on which repositories and branch you are working on
  • Files History : visualize navigate and explore the revision history of current file
  • Line History : visualize navigate and explore the history of the selected lines of current file
  • Compare Commits : to visualize comparisons between branches, tags, commits, and more, THIS is the most interesting tool that we are going to use
  • Search Commits : to search and explore commit histories

With the Compare Commits tool we can click Compare <branch, tag, or ref> and be able to compare 2 branch:

VinceOPS | Git : Astuces et productivité #2

If you click on a commit or a file, you will be in read only mode. To modify your file side by side you will have to click on a button.
This button is Compare with HEAD here is where is it located:

You can now compare and modify the file side by side, what you cannot do with Visual Studio in a single branch.

React.JS / React Native : Class VS Hooks

No matter if you are using React.JS or React Native, Javascript or Typescript, you can choose these 2 ways to manage the states.

Using Class OR using Hooks : What are the differences ?

Class

import React, { Component } from 'react'; 

[...]

class Button extends Component {
    constructor(props){
        super(props);

        this.state = {
            touched: false,
            selected: false,
        }
    }

  toggleTouched = () => {
    this.setState({
      touched: true
    });
  } 
    
    render(){ 
        return( 
            <button id="button" onMouseOver={this.toggleTouched} >
                click me!!
            </button>
        );
    } 
}

export default Button;

Using a class, you need to create a class that extends from a React Component. Like every class in every languages, you use the constructor to init the class. We use it to set the default values to our states. Moreover, we need to use “this” in that class to know that we are getting the values or the function in this class, this refer to the context.


Hooks

import React, { memo, useState, useEffect } from 'react'; 

[...]

const Button = memo((props) => {
  const [touched, setTouched] = useState(false);
  const [selected, setSelected] = useState(false); 
 
  const toggleTouched = () => {
    setTouched(true);
  } 

  return( 
     <button id="button" onMouseOver={toggleTouched} >
        click me!!
     </button>
  );
}); 

export default Button;

Same component, working the same too, but we need a bit less code.
We don’t need a constructor, to set the default value to our states, we just use the parameter of useState.
We don’t need the “this” keyword too, because we don’t are in a class anymore.

Instead of using setState, we use useState.
When it starts if “use…”, we are talking about hooks :
– useState : set a state with the name, the setter, the initial value
– useEffect : refresh if specific state is changed, we can use it as “ComponentWillMount” if we don’t give a state in 2nd param
– useRef : Reference for JSX
– useCallback, …etc.

Hooks seems to be the new best way to manage our states and you should use it as it may save a lot of times and lines in your code.

Create a dynamic list from JSON • React Native / React.JS

How can we create a dynamic list of objects like Views or Texts, dynamically, in a loop in React Native or React.JS from a JSON response from a REST API ?

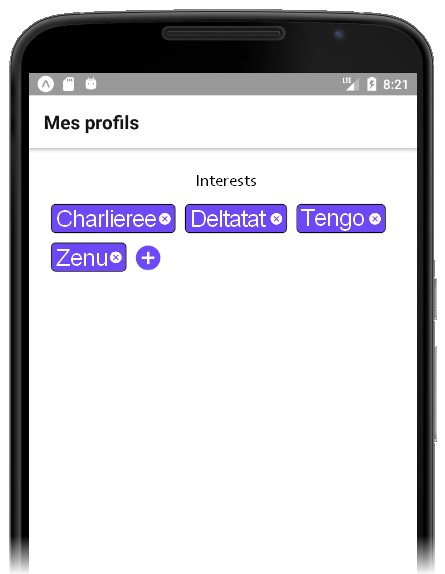
The objective is to create a dynamic interface with buttons for adding and removing elements like that :

First, we will use the data variable to store a JSON reponse (later you can change it with the API response with a fetch() function), it will contains 3 elements.

[
        {
            "id": "01",
            "name": "Charlie",
        },
        {
            "id": "02",
            "name": "Tango",
        },
        {
            "id": "03",
            "name": "Delta",
        }
] 

Then, we will create the json variable to store the parsed JSON from the data variable. It means, the data variable is only a text string and the json variable is a JSON object, so we can do json[0].id for example.

We can put the json variable as a state so if the JSON changes, the UI with refresh automaticaly.

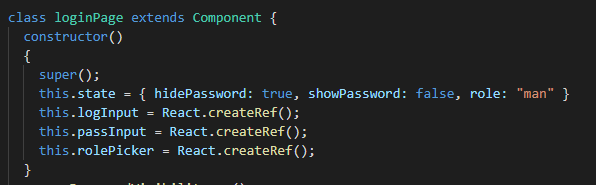
Here is what it should look likes in your code, in the constructor of your class :

export default class DynamicList extends React.Component {
  constructor(props) {
    super(props);

    let data = `
    [
        {
            "id": "01",
            "name": "Charlie",
        },
        {
            "id": "02",
            "name": "Tango",
        },
        {
            "id": "03",
            "name": "Delta",
        }
    ]`;

    let json = JSON.parse(data);
    console.log('json ', json);

    this.state = {
      list: json,
    };
  } 

[...]

Now, to display a list from the state list (it will be this.state.list), we will use the map() function in render(), before the return, to create as many objects that we have elements in the list array.
In your map() function, you will have 2 parameters : data and i. You will have to put the i, the incremental variable, as a “key” in each object you will return as a new element – here, it’s <TouchableOpacity> :

render() {
    // HERE WE MAKE OUR LIST OF OBJECTS
    const soldierList = this.state.contracts.map((data, i) => {
      return (
        <TouchableOpacity
          key={i}
        >
          <View
            style={{
              flexDirection: 'row',
              justifyContent: 'flex-start',
              paddingTop: 5,
              paddingBottom: 5,
            }}
          >
              <Text style={{ fontFamily: 'Gotham-Medium', color: '#8DA8C7' }}>
                {dateShort(data.datestart)}
              </Text>
            </View>
            <View style={{ flexDirection: 'row', right: 0, position: 'absolute', bottom: 5 }}>
              <MaterialCommunityIcons
                name="cross"
                style={{ color: '#0261D2', lineHeight: 20 }}
              />
            </View>
          </View>
        </TouchableOpacity>
      );
    });

    // NOW WE CAN DISPLAY IT, IF THE LIST IS EMPTY WE GOT THE EMPTY LIST MESSAGE
    return (
      <ScrollView style={{ backgroundColor: '#f6f6f6', height: '100%', width: '100%' }}>
        {this.state.list.length < 1 && (
          <View style={{ alignItems: 'center' }}>
            <Text style={{ fontWeight: 'bold', color: '#0361d2', fontFamily: 'Gotham-Medium' }}>
              Empty list !!!
            </Text>
          </View>
        )}
        {this.state.list.length >= 1 && <View>{soldierList}</View>}
      </ScrollView>
    );
  }  

UPDATE (SOLUTION 2)

We can optimize it by testing directly the length of the array, making less code in the return :

render() {
     // HERE WE MAKE OUR LIST OF OBJECTS
     const soldierList = this.state.contracts.length ? this.state.contracts.map((data, i) => {
      return (
        <TouchableOpacity
          key={i}
        >
          <View
            style={{
              flexDirection: 'row',
              justifyContent: 'flex-start',
              paddingTop: 5,
              paddingBottom: 5,
            }}
          >
              <Text style={{ fontFamily: 'Gotham-Medium', color: '#8DA8C7' }}>
                {dateShort(data.datestart)}
              </Text>
            </View>
            <View style={{ flexDirection: 'row', right: 0, position: 'absolute', bottom: 5 }}>
              <MaterialCommunityIcons
                name="cross"
                style={{ color: '#0261D2', lineHeight: 20 }}
              />
            </View>
          </View>
        </TouchableOpacity>
      );
    }) : (
      <View style={{ alignItems: 'center' }}>
        <Text style={{ fontWeight: 'bold', color: '#0361d2', fontFamily: 'Gotham-Medium' }}>
          Empty list !!!
        </Text>
      </View> 
    );
 
    // NOW WE CAN DISPLAY IT, IF THE LIST IS EMPTY WE GOT THE EMPTY LIST MESSAGE
    return (
      <ScrollView style={{ backgroundColor: '#f6f6f6', height: '100%', width: '100%' }}>
        {soldierList}
      </ScrollView>
    ); 
 } 

MongoDB on RedHat/CentOS/Fedora

INSTALLATION OF CENTOS

Add the additionnal following repo to get the mongoDB package not included by default:

  • nano /etc/yum.repos.d/mongodb-org-4.2.repo
[mongodb-org-4.2]
name=MongoDB Repository
baseurl=https://repo.mongodb.org/yum/redhat/$releasever/mongodb-org/4.2/x86_64/
gpgcheck=1
enabled=1
gpgkey=https://www.mongodb.org/static/pgp/server-4.2.asc
  • yum install -y mongodb-org

ADDING ADMIN USER

  • mongo
  • use admin
db.createUser({
       user: "username",
       pwd: "password",
       roles: [ "root" ]
   }
)

TESTING

  • mongo -u username -p password

ACCESS MONGODB FROM INTERNET

  • sudo nano /etc/mongod.conf

Change 127.0.0.1 (localhost) to 0.0.0.0 (all IP):

#bindIp: 127.0.0.1 
bindIp: 0.0.0.0

Restart the mongod service using this command:

  • sudo service mongod restart

USING A MONGODB TOOL GUI

You can use several tools to access and manage your mongoDB database. I recommend using the following tools:

Alert confirmation message for sensible actions

Hello everyone,

In your application, is it possible that you made a settings page where the user can edit and remove things inside your app. For example, let’s say there is a button to remove definitely the user account and all his data. We can say that this type of operation is sensible and should be verified.

When the user click on the button “Delete my account”, we will display a message of confirmation “Do you really want to remove your account ?”. If he click DELETE, we will remove it, if not, we will close the message. Simple as that.

In our code, we will first import alert :

 import { ... , Alert } from 'react-native'; 

Then, you we create a function “deleteAccount” called when the “Delete my account” button is pressed :

  <Button onPress={ () => { this.deleteAccount(); } } title="DELETE MY ACCOUNT"/> 

Inside deleteAccount, we will put our Alert message :

How to use WebSockets • React Native

It can be very simple to do GET, POST, PUT and DELETE requests with React Native (see the official Expo documentation https://docs.expo.io/versions/latest/react-native/network/), therefore, those requests are not interesting when we want to do a chat for example (we can talk about “real time events”).

To do it, you need first to create a WebSocket server. It won’t be on the phone, because usually the phone is only the client.

You can create a simple WebSocket server with this Perl library : https://metacpan.org/pod/Net::WebSocket::Server
Only few lines are necessary to make your WebSocket server running.


In your App.js, you can add the IP of your server in a global variable at the top of your file :

Then in your constructor you can add the WebSocket( WS_ADRESS_SERVER_STRING ) Javascript object, so the websockets will be listen when the application is starting.
You can add the 4 events onopen, onmessage, onerror, onclose :

Now you should add ws.send() to send data inside your code or inside your UI with onPress.

Hide and show blocks of content • React Native

While creating single page application or making dynamic forms, is it important to show or hide parts that we want the user to see or not.
We simply do this by adding variables in the constructor of the class :

this.level and this.status

Inside functions of the class we will modify the variables this.level and this.status.
We will display content by testing the value of those variables.
To do it, we will add { this.VARIABLE == VALUE && before the content we want and } at the end. For example :

How to get input text • React Native

In this article we will see how to get the user input text inside the <TextInput>, very simply.
In this example, we will be using a login page :

Login page

Add the reference for each TextInput at the top of your login class, inside the constructor :

Add references with React.createRef()

Then, put the ref tag inside the each TextInput.
Attribute this ref tag to each variable that have been referenced. Here is the example with this.logInput :

add the ref tag

Now you can get the value by using this.logInput.current._lastNativeText inside our code.

моя жизнь - дерьмо