Tag: google cloud

Start Google Cloud instance VM from a shared image from another Project / Organization

If you have multiple projects or organization and you want to clone a machine that is already configured, you can create an image of the instance of the machine.
But, you will have to share the access to the external project and organization.
Here is how to do it :

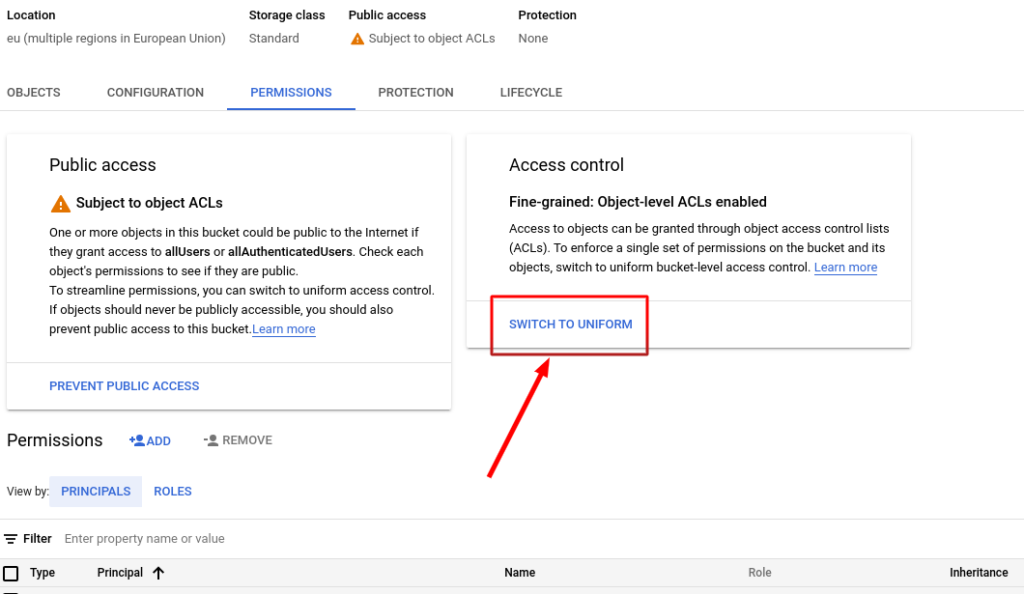
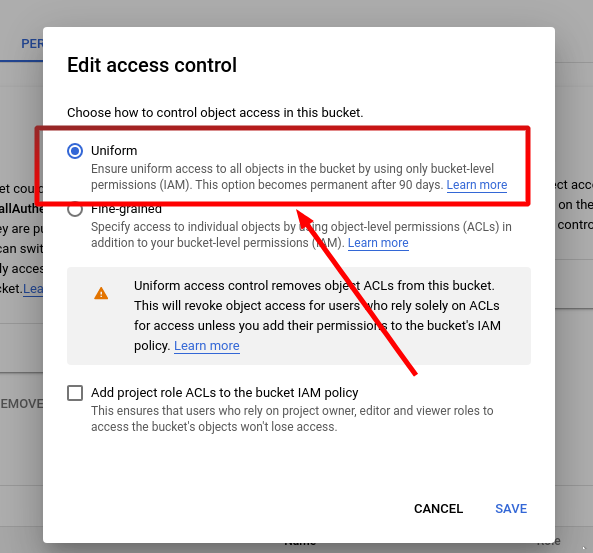
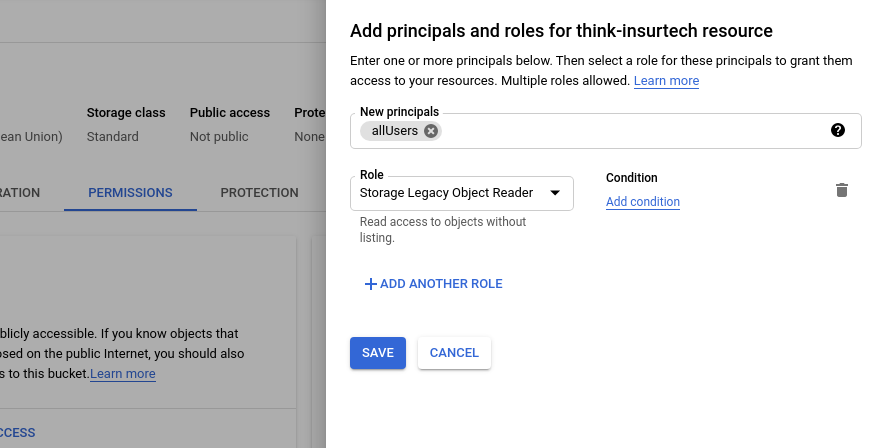
Share the image to the organization in the Images and in IAM

In both IAM and Image (VM) you will have to share the access Compute Image User

Start the VM using the shared image from another project / organization

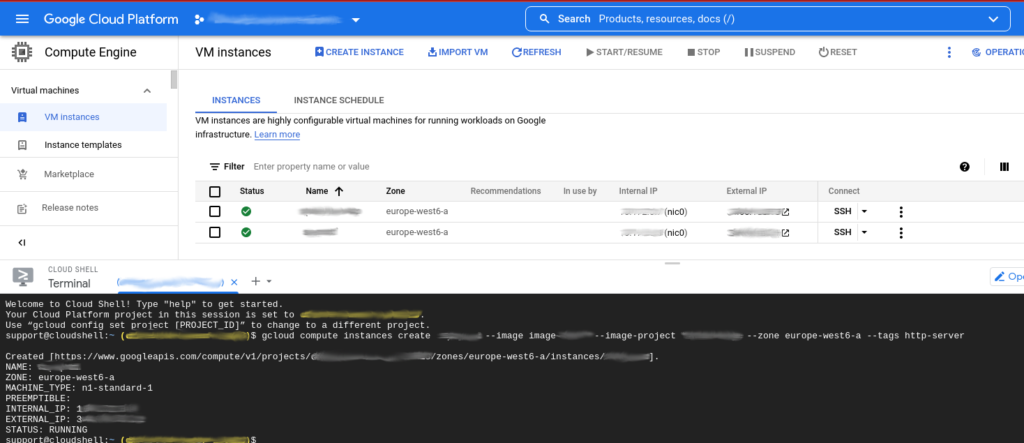
gcloud compute instances create INSTANCE-NAME --image SHARED-IMAGE-NAME --image-project PROJECT-NAME --zone ZONE --tags http-server
  • INSTANCE-NAME : Name of the VM instance you are creating (that will appear in the VM list)
  • SHARED-IMAGE-NAME : The name of the image you shared to the organization
  • PROJECT-NAME : The name if the project where is the image you shared to the organization
  • ZONE : The geographical zone of the VM

Now the machine is started from an image from another organization and project !

How to solve error SQL Import Google Cloud

Is it possible that when you try to import a backup of your MySQL database on Google Cloud, you have the following error :

We are trying to import a backup in Google Cloud SQL
The following error appears in the logs
error: exit status 1 stdout(capped at 100k bytes): stderr: ERROR 3546 (HY000) at line 26: @@GLOBAL.GTID_PURGED cannot be changed: the added gtid set must not overlap with @@GLOBAL.GTID_EXECUTED

To solve the problem, open the SQL file with text editor and search the error “@@GLOBAL.GTID_EXECUTED”

After modifying the *.sql file, you should be able to import successfully :

It should now work

Import / Export MySQL Workbench tables in Google Cloud SQL database

If you have a database on Google Cloud and you want to import and export some tables to another database, you will need a database explorer to export your .SQL backup.

Export the tables you want in database

Google Cloud interface only allow to export all a database or a specific database, but not tables

As you can see you don’t have the option to select tables.
To do so, you will have to connect the database with a SQL explorer.
In MySQL Workbench you should go in Server > Data Export

Then you should be able to select the tables you want

select Export to Self-Contained File to have a .SQL file

Import the SQL file to Google Cloud

You will need to upload the SQL file to Google Cloud in order to import it. In order to do it, go to Google Cloud > Cloud Storage, create the bucket if it doesn’t exist yet :

create the bucket dedicated for SQL, with random numbers, to have a unique name
Upload the SQL file generated by MySQL Workbench

Then, you can go on Google Cloud > SQL > Import

Select the SQL file from the bucked and select the database you want the tables to be imported

And then you should have imported successfully the tables on the selected database. You should check it in Operations


In case of errors, check the error in Operations, and modify the .SQL file with a text editor, search the error in the SQL file and remove the lines, and repeat the process (upload it again to Google Cloud Storage and import the SQL file again)

Public Images for your React / Angular app on Google Cloud

We often need images in our React or Angular app, but putting them in the project is not clean.
So we can use Google Cloud with Cloud Storage for the images on your app.

There are many advantages of using Cloud Storage to expose public images :
– Real time maintenance (upload, delete, change, …)
– You don’t need any commit on your git (if you commit images on your Github / Gitlab for example)
– Clean project, only code files
– Light project repository to commit, images are heavy quickly

Create a Bucket

First, you need to create a Bucket (it’s like a big folder) if you don’t already have one.

Switch to Uniform access control

Then, to make your Bucket public, go to the Permissions tab, and change the access control to Uniform :

You should click Switch to Uniform, so you don’t have to make public each file one by one
You can see, if you upload your first image, that it’s not public yet

Add public access using by adding a Reader role for allUsers

You can then add the access of Object Reader to allUsers
Then you can see it’s Public to Internet and you are able to copy URL

You can now use you image anywhere, it’s on internet and anyone can see it with the URL, so you can use it to store images for your React / Angular app, all images will work.

Google Cloud Function VS AWS Lamdba (how to import)

There are some differences between Google Cloud and AWS when you want to deploy your function for your API.

My point of view is that Google Cloud function may be a bit more simple to deploy but AWS is in a way the most reliable and complete cloud environnement nowadays.

On both cloud environnement you can upload the code with a ZIP, you can so use the same way to adjust your code for AWS:

We will upgrade the code with a repository that will be in a ZIP

Differences between Google Cloud functions and AWS Lambda (Node.JS)

THE DEPENDENCIES
– In Google Cloud, the dependencies are automatically installed from the package.json file
– In AWS, you need to install the dependencies with npm or yarn, that will build the node_modules folder
If you don’t have the node_modules folder, your Lamdba function will not work with the following error:

{
  "errorType": "Runtime.ImportModuleError",
  "errorMessage": "Error: Cannot find module 'MODULE'\nRequire stack:\n- /var/task/index.js\n- /var/runtime/UserFunction.js\n- /var/runtime/index.js",
  "trace": [
    "Runtime.ImportModuleError: Error: Cannot find module 'MODULE'",
...

THE MAIN FUNCTION

With Google Cloud, the example function looks like this:

exports.helloWorld = (req, res) => {

  res.status(200).send(message);
};
  • You use the res object with the send() method to send the response

With AWS, the example function looks like this:

exports.handler = async (event) => {

    const response = {
        statusCode: 200,
        body: JSON.stringify(jsonObj),
    };
    return response;
};
  • You return a JSON object response that should contains the body and the statusCode

So the same code will looks like this:

Using parameters

Let’s say now we want to use a parameter for our route, that will be number and the value will be 10, so we will call the route helloWorld?number=10

On GOOGLE CLOUD, to get the “number” parameter, we will use the req object :

exports.helloWorld = (req, res) => {
    let number = req.query.number;

On AWS, to get the “number” parameter, we will use the event object :

exports.handler = async (event) => {
    let number = event["params"]["number"];