Faire une demande de remboursement de TVA (Micro Entrepreneur)
Pour faire une demande de remboursement de TVA tout d’abord vous devez faire la déclaration de TVA.
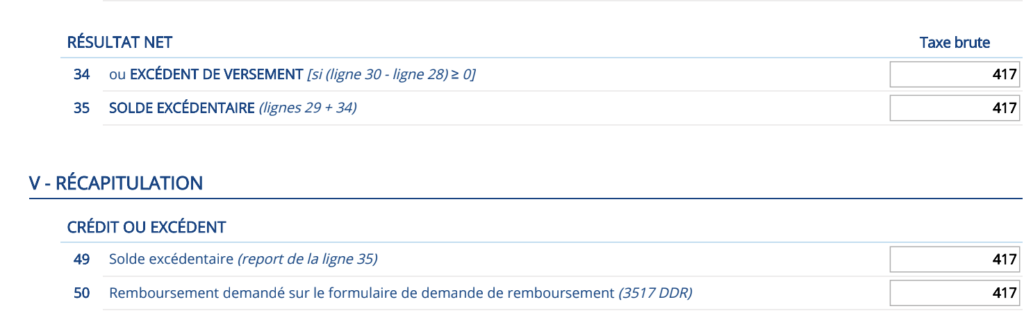
A savoir potentiellement les lignes 34, 35, 49, 50 dans la déclaration (demandez confirmation à votre comptable) :
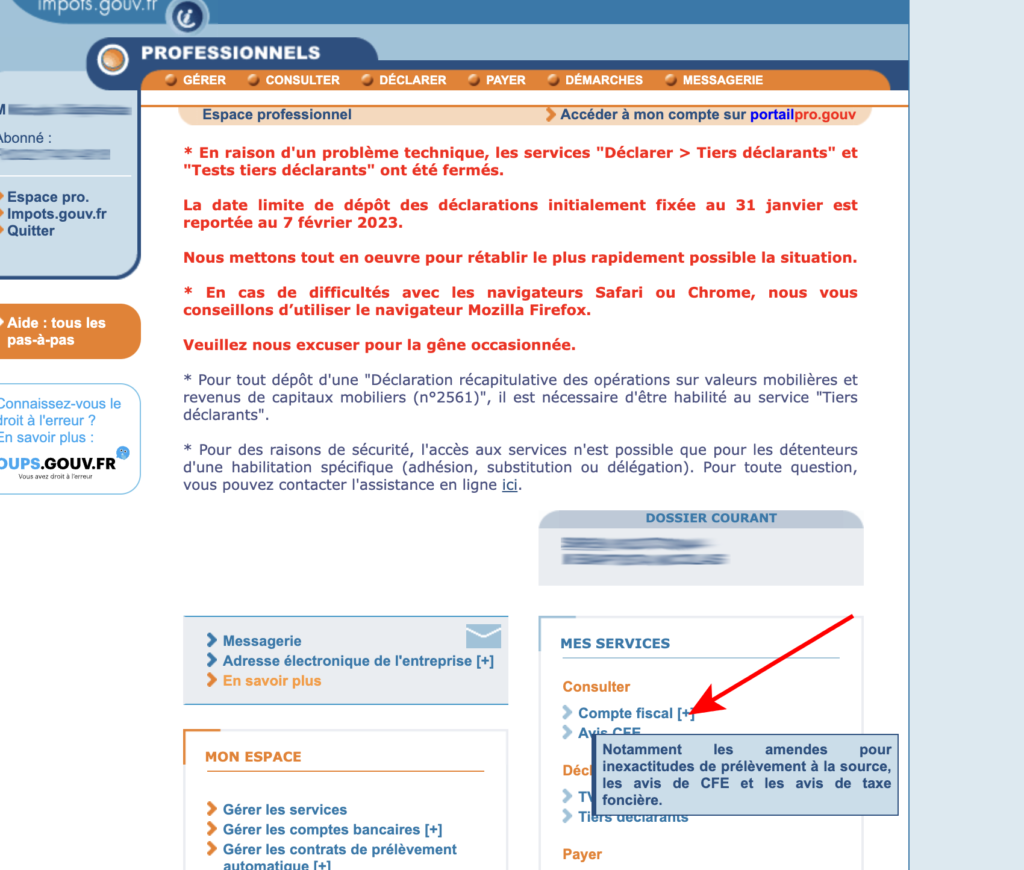
Ensuite, il faut remplir un formulaire spécifique de demande de remboursement de TVA. Pour accéder à ce formulaire il faut aller dans Déclarer la TVA dans votre espace professionnel, et en bas de la page remplir la période lié à la demande de remboursement de TVA :
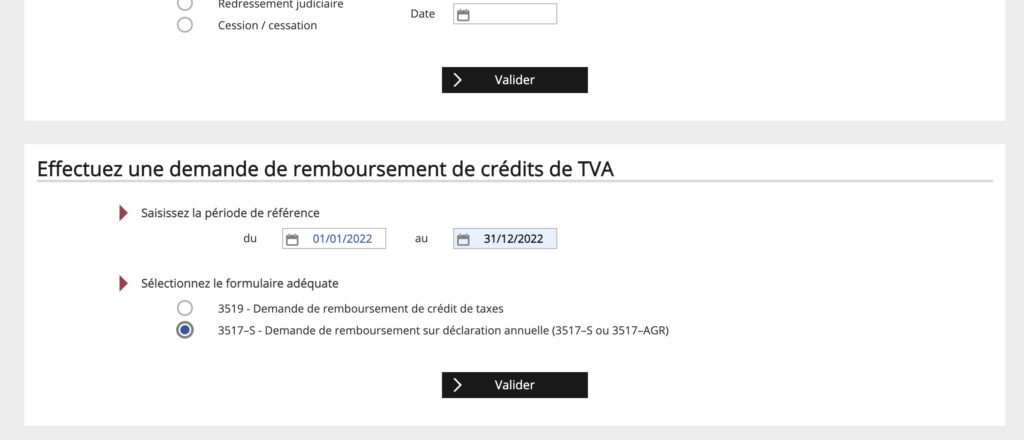
Attention, si la période n’est pas bonne, il y aura une erreur. En effet, il y a une vérification de vos déclarations quand vous cliquez sur valider.
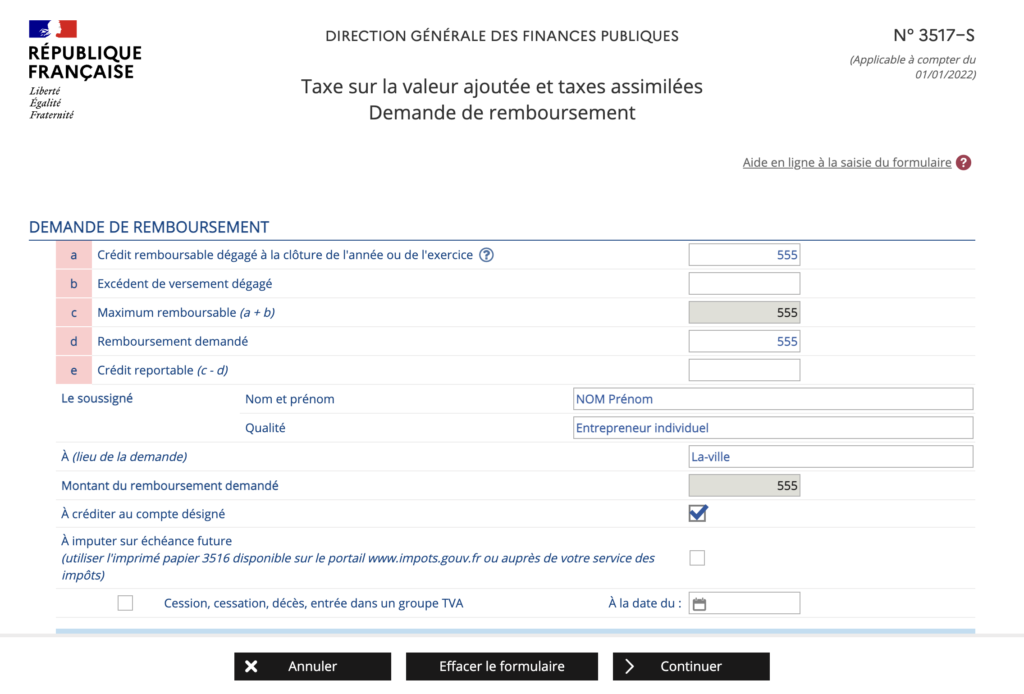
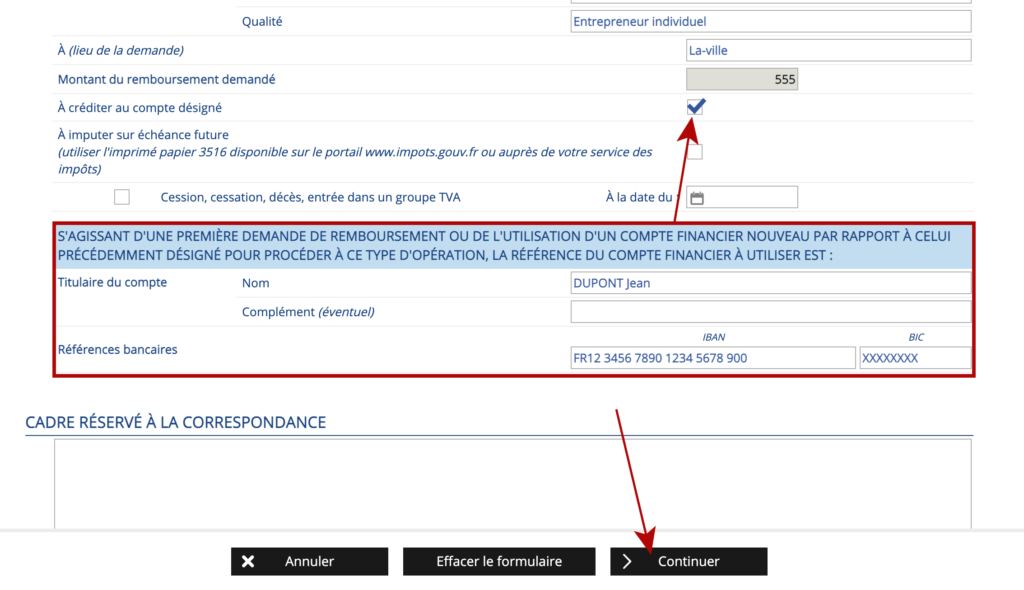
Ensuite, le formulaire suivant s’affiche. Dans le cas d’un montant de 555€ mis dans la case “50 Remboursement demandé sur le formulaire de demande de remboursement (3517 DDR)” de la précédente déclaration, il faudra remplir le formulaire 3517-S de la façon suivante.
Rappel: On ne peut pas déclarer de nombre non entier, une TVA de 456,50€ sera arrondi à 457. Une TVA à 456,20 sera arrondi à 456.
Voici enfin une vidéo additionnelle qui montre comment faire la déclaration de TVA dans le cas d’une micro entreprise et qui récapitule un peu tout ça: